
Ultimate Guide To Recipe For Bosco Sticks: The Cheesy, Crunchy Snack You Can't Resist!
Imagine this: warm, gooey, cheesy sticks wrapped in golden, flaky pastry. That's right, we're diving deep into the world of bosco sticks. If you're here, chances are you're already drooling. And who can blame you? These little wonders are like a party in your mouth. Today, we're going to unravel the secrets behind making the perfect bosco sticks right at home. Whether you're a cheese fanatic or just looking for an easy snack to impress your friends, this recipe is about to change your life.
Now, let's be real. Bosco sticks aren't just any snack—they're a level-up version of your regular cheese sticks. They're crispy on the outside, melty on the inside, and pack a punch of flavor that keeps you coming back for more. Plus, they're super versatile. You can serve them as appetizers at parties, munch on them during movie nights, or even pack them for picnics. The possibilities are endless!
But here's the deal: not all bosco stick recipes are created equal. Some end up too soggy, others don't have enough cheese, and let's not even talk about the ones that taste like cardboard. We're here to make sure that doesn't happen to you. With this guide, you'll learn step-by-step how to make bosco sticks that are as delicious as they are easy to prepare. So grab your apron and let's get started!
- Mamitha Baiju Gre Das Geheimnis Ihres Erfolgs Jetzt Entdecken
- Exklusive Einblicke Paula Reid Hochzeit Alle Details Amp Hintergrnde
Table of Contents
- What Are Bosco Sticks?
- Ingredients You Need
- Step-by-Step Guide
- Cooking Tips
- Common Mistakes to Avoid
- Nutrition Information
- Variations and Twists
- Storage and Reheating
- Frequently Asked Questions
- Conclusion
What Are Bosco Sticks?
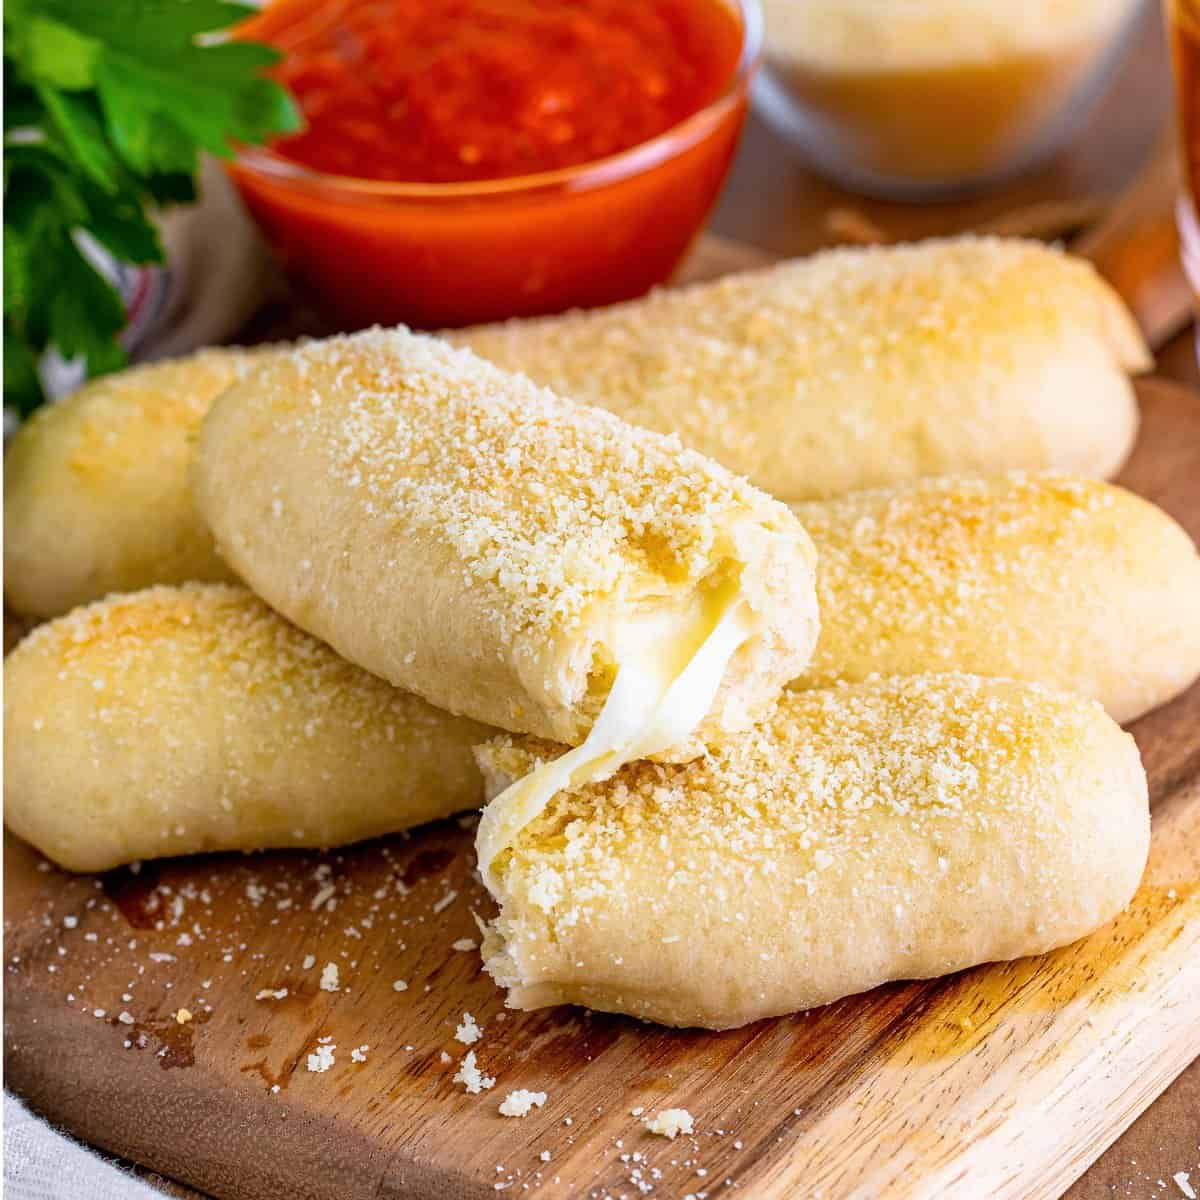
Alright, let's break it down. Bosco sticks are essentially cheese sticks wrapped in puff pastry. They're baked until golden brown, creating this amazing contrast between the crispy exterior and the gooey, cheesy center. Think of them as a hybrid of mozzarella sticks and croissants—pure genius, right? And the best part? You can customize them to your taste. Add herbs, spices, or even a drizzle of honey for a sweet twist.
These snacks have become super popular in recent years, and for good reason. They're easy to make, pack a ton of flavor, and are perfect for sharing. Whether you're hosting a game night or just want a quick snack, bosco sticks are always a hit. And hey, who doesn't love a little cheesy indulgence every now and then?
A Brief History
While the exact origins of bosco sticks are a bit hazy, they're believed to have originated from the same culinary traditions that gave us cheese-filled pastries. Over time, they've evolved into the snack we know and love today. What started as a simple combination of cheese and dough has turned into a full-blown phenomenon, with people all over the world putting their own spin on it.
- Alles Ber Nina Aouilks Eltern Wer Sind Sie Wirklich
- Logan Moreau Alles Ber Den Nhl Star Der Blue Jackets
Ingredients You Need
Before we dive into the recipe, let's talk about what you'll need. The beauty of bosco sticks is that they don't require a ton of fancy ingredients. Most of the stuff you probably already have in your kitchen. Here's a quick rundown:
- Puff pastry sheets (you can find these in the frozen aisle)
- Mozzarella cheese (shredded or in sticks)
- Eggs (for the egg wash)
- Flour (optional, for dusting)
- Seasonings like garlic powder, parsley, or oregano
- Oil or butter for greasing the baking sheet
And that's it! Simple, right? Of course, you can always add your own twists, but this is the basic recipe that works every time.
Optional Ingredients
If you want to take your bosco sticks to the next level, consider adding some of these extras:
- Monterey jack or cheddar cheese for a different flavor profile
- Red pepper flakes for a spicy kick
- Herb-infused oil for brushing
- A drizzle of honey or marinara sauce for dipping
Step-by-Step Guide
Now that you've got your ingredients ready, let's get cooking! Follow these simple steps and you'll have a batch of delicious bosco sticks in no time.
Step 1: Prep Your Ingredients
Start by preheating your oven to 400°F (200°C). While it's heating up, take your puff pastry sheets out of the freezer and let them thaw slightly. Shred your mozzarella cheese if you're using blocks, or keep them in stick form if that's what you have. Grab a bowl and crack an egg into it, then whisk it with a little water to create your egg wash.
Step 2: Roll Out the Pastry
Once your pastry sheets are thawed, lightly dust your work surface with flour to prevent sticking. Roll out the sheets until they're about 1/4 inch thick. If you want perfectly uniform sticks, use a pizza cutter or knife to trim the edges.
Step 3: Fill and Roll
Place a strip of mozzarella cheese along one edge of the pastry. Roll the pastry tightly around the cheese, making sure to seal the edges by pressing them down gently. Repeat this process until you've used up all your pastry and cheese.
Step 4: Brush with Egg Wash
Place your rolled bosco sticks on a greased baking sheet, leaving a little space between each one. Use a pastry brush to lightly coat the tops of the sticks with the egg wash. This will give them that beautiful golden color when they bake.
Step 5: Bake to Perfection
Pop your baking sheet into the oven and let those bosco sticks bake for about 15-20 minutes, or until they're golden brown and puffy. While they're baking, you can prepare your dipping sauces or set the table for serving.
Cooking Tips
To ensure your bosco sticks turn out amazing every time, here are a few tips to keep in mind:
- Don't overfill the pastry—this can cause the cheese to leak out while baking.
- Seal the edges of the pastry tightly to prevent the cheese from oozing out.
- Use a sharp knife or pizza cutter for clean cuts when trimming the pastry.
- Experiment with different cheeses to find your favorite combination.
Common Mistakes to Avoid
Even the best chefs make mistakes sometimes, but with a little know-how, you can avoid them. Here are a few common pitfalls to watch out for:
- Using frozen pastry sheets without thawing them properly
- Not sealing the edges of the pastry, leading to cheese leaks
- Oven temperature too low, resulting in soggy sticks instead of crispy ones
- Overbaking, which can make the pastry dry and hard
How to Fix Them
If you do encounter any of these issues, don't worry! Here's how you can fix them:
- Thaw your pastry sheets according to the package instructions before using them.
- Press the edges of the pastry firmly to ensure a tight seal.
- Double-check your oven temperature and adjust as needed.
- Keep an eye on the sticks while they're baking to prevent overcooking.
Nutrition Information
Now, let's talk about the nutritional side of things. While bosco sticks are undeniably delicious, they're also pretty calorie-dense. Here's a rough estimate of what you can expect per stick:
- Calories: 150-200
- Fat: 10-15g
- Carbs: 10-15g
- Protein: 5-8g
Of course, these numbers can vary depending on the size of your sticks and the specific ingredients you use. If you're watching your intake, consider making smaller sticks or using reduced-fat cheese.
Variations and Twists
One of the coolest things about bosco sticks is how versatile they are. Here are a few ideas to shake things up:
Spicy Bosco Sticks
Add some heat by sprinkling red pepper flakes or cayenne powder onto your sticks before baking. For an extra kick, mix some hot sauce into your dipping sauce.
Herby Bosco Sticks
Chop up some fresh herbs like basil, thyme, or rosemary and sprinkle them over the egg wash before baking. This adds a fresh, fragrant twist to your snack.
Sweet Bosco Sticks
For a dessert version, substitute the cheese with chocolate or caramel, and drizzle with honey or powdered sugar after baking. Perfect for satisfying your sweet tooth!
Storage and Reheating
Leftovers happen, and that's okay! Here's how to store and reheat your bosco sticks:
- Store leftover sticks in an airtight container in the fridge for up to 3 days.
- To reheat, pop them in the oven at 350°F (175°C) for 5-10 minutes, or microwave them for 20-30 seconds. The oven method is preferable for maintaining that crispy texture.
Frequently Asked Questions
Got questions? We've got answers! Here are some of the most common queries about bosco sticks:
Can I Freeze Bosco Sticks?
Absolutely! Let them cool completely, then store them in a freezer-safe bag. When you're ready to eat them, bake them straight from frozen for about 20-25 minutes.
What Should I Serve with Bosco Sticks?
Marinara sauce is always a classic choice, but don't be afraid to get creative. Ranch dressing, honey mustard, or even a spicy dipping sauce can take your snack game to the next level.
Conclusion
And there you have it—everything you need to know about making the perfect bosco sticks. From the basics to the advanced tips, this guide has got you covered. So go ahead, give it a try, and let us know how it turns out. Don't forget to share your creations with your friends and family, and maybe even teach them a thing or two about bosco stick mastery.
Until next time, keep snacking and keep cooking! And if you have any questions or comments, feel free to drop them below. We'd love to hear from you!
Article Recommendations
- Was Ist Eine Kdfrau Ursachen Folgen Hilfe Fr Betroffene
- Alles Ber Wer Ist John Oates Verheiratet Frau Familie Duo


Detail Author:
- Name : Carolina Weber
- Username : finn16
- Email : wanda.roob@hotmail.com
- Birthdate : 1970-12-09
- Address : 20454 Josephine Fords Suite 240 East Durwardberg, MS 86183
- Phone : 845-701-0739
- Company : Jerde-Cole
- Job : Nutritionist
- Bio : Non earum et nisi quibusdam repellendus cum aut officia. Deleniti ea et libero dolorem enim veniam. Minima non similique architecto libero voluptatum amet nobis.
Socials
instagram:
- url : https://instagram.com/yessenia_lehner
- username : yessenia_lehner
- bio : Vel quis magni mollitia quia alias explicabo sequi. Eum est a quam ducimus et.
- followers : 4086
- following : 467
linkedin:
- url : https://linkedin.com/in/yessenia.lehner
- username : yessenia.lehner
- bio : Tempore aspernatur sint maxime amet id.
- followers : 1588
- following : 2159
